Generating AI Images
Choose style presets, add plain-language image instructions, generate images for blog posts and social content, and create a Custom Brand preset from your own reference images.
Updated Sep 18, 2026
Nolorem generates images using AI models from Fal.ai. Every blog post can have a featured image and per-section images, all generated to match a consistent visual style through presets.
Choosing a Style Preset
When creating or editing a blog post, open the image settings to select a preset. Each preset controls the visual style of every image generated for that post. You can preview each option in the style picker.
You can also set a blog-wide default in Settings, under Image Styles, so new posts start from your preferred look.
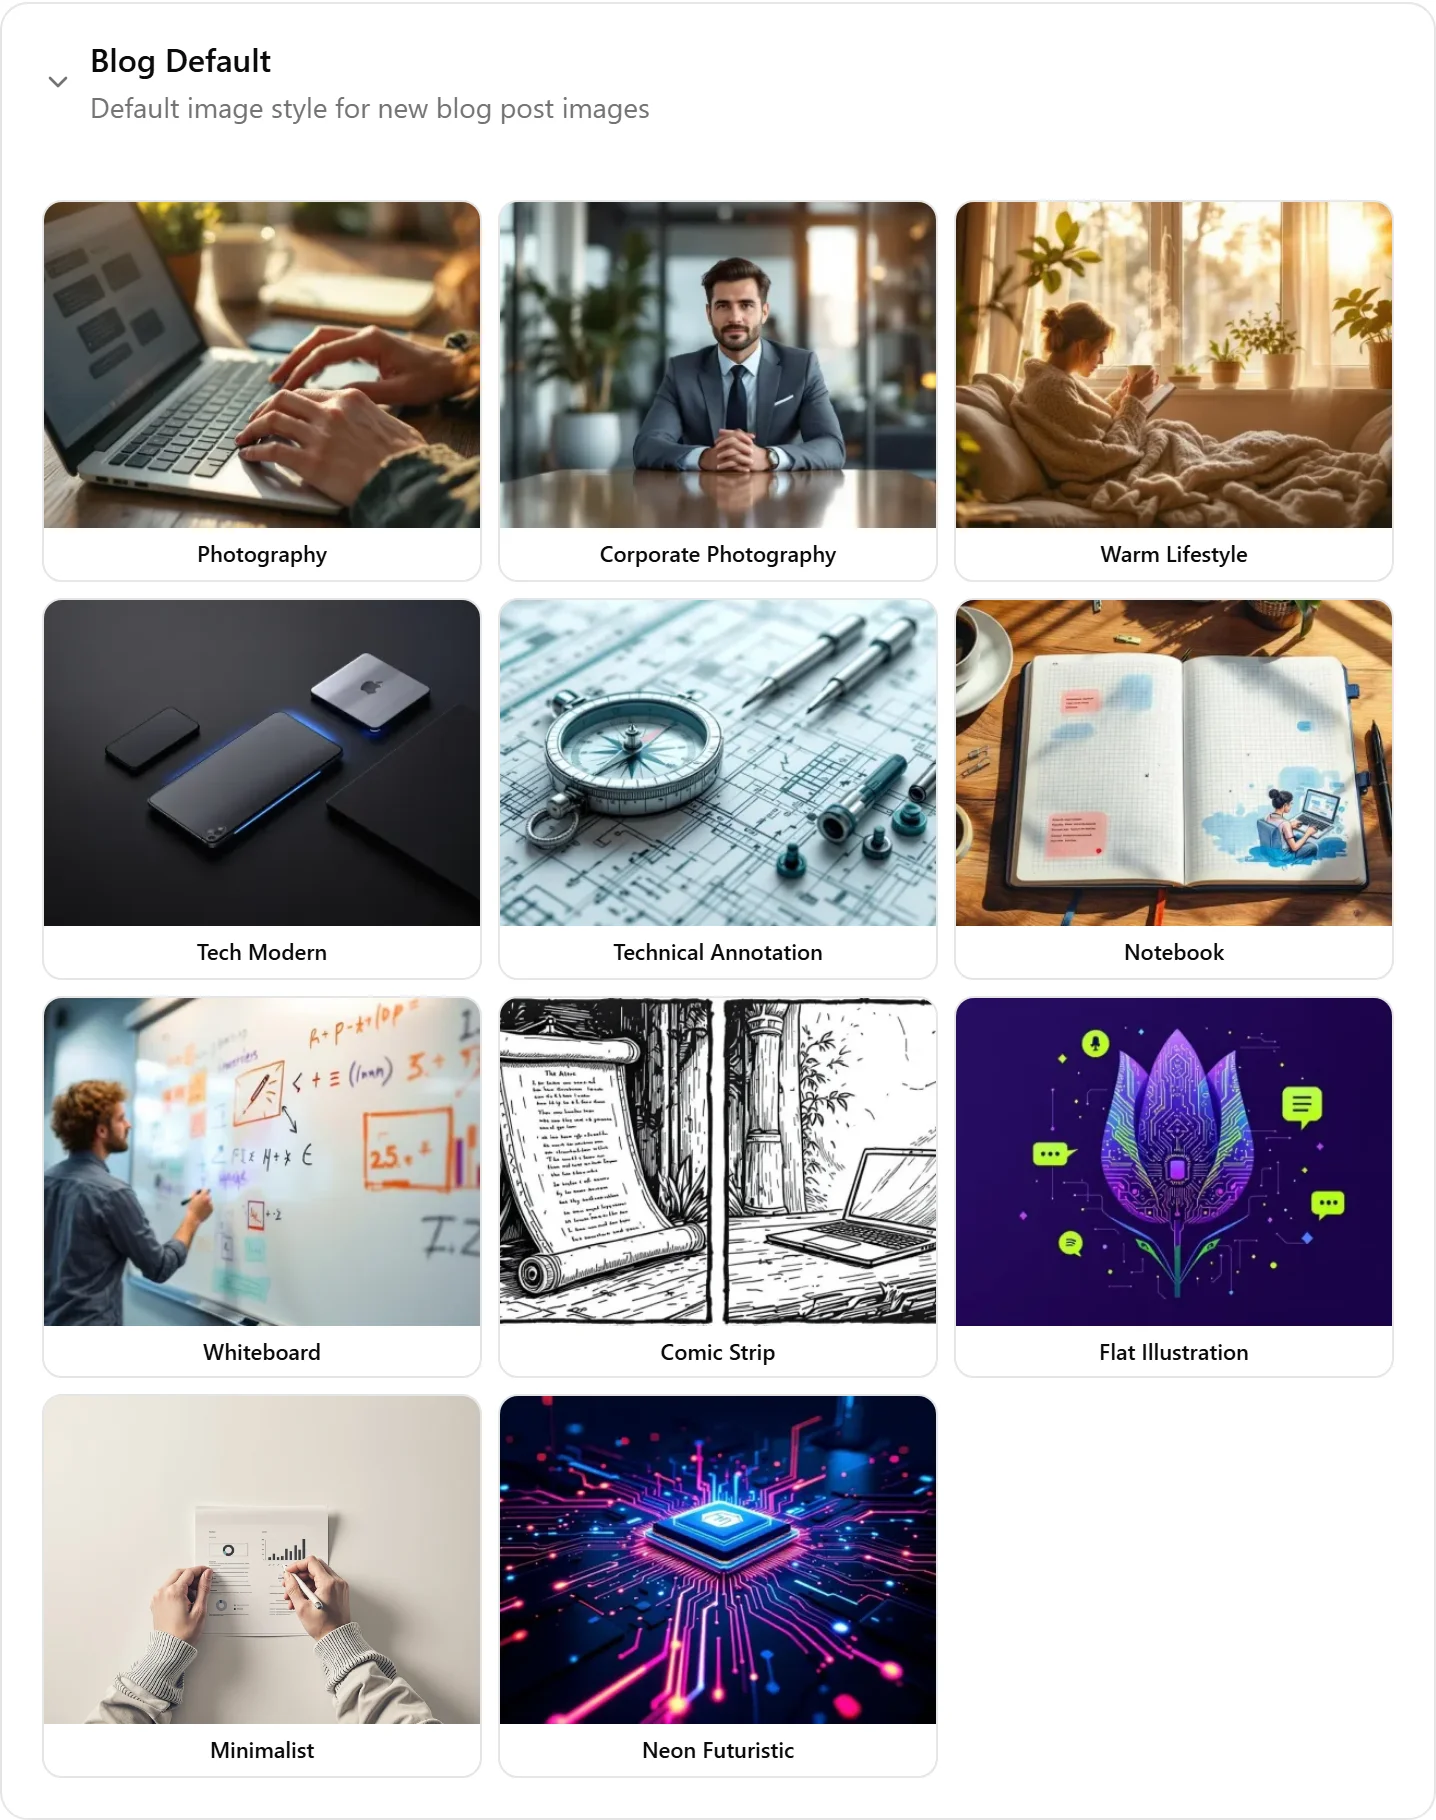
Available Presets
- Photography: natural, everyday photography with shallow depth of field
- Corporate Photography: professional corporate imagery, clean office environments
- Warm Lifestyle: golden hour lighting, natural textures, 35mm film grain feel
- Tech Modern: sleek dark backgrounds, brushed aluminum, minimal and clean
- Neon Futuristic: sci-fi aesthetic with neon accents and holographic elements
- Technical Annotation: engineering blueprint on grid paper with annotation arrows
- Notebook: handwritten sketchnotes in an open notebook with natural daylight
- Whiteboard: professor's whiteboard with colored dry-erase marker diagrams
- Comic Strip: black and white comic strip panels, retro newspaper aesthetic
- Flat Illustration: flat vector illustration, limited color palette
- Minimalist: single object with lots of negative space, monochromatic
How Presets Work
Some presets use template mode, where the AI picks metaphorical subjects and the system assembles the final image prompt from a locked template. This prevents style drift between images in the same post.
Other presets use free mode, where the AI writes full image prompts guided by the preset's style instructions and example prompts.
Image Instructions
Presets control the overall look. Image instructions let you add your own house rules in plain language, in any language, that the AI respects when it writes each image prompt. Use them for things a preset does not cover: composition, framing, lighting mood, subjects to avoid, or a specific color treatment.
There are two levels.
Blog-level (applies to every post). Go to Settings, open the image style section, and use the Instructions field, which takes up to 4000 characters and counts them as you type. Whatever you type here becomes house rules for every image generated across that blog. For example: "shallow depth of field, 50mm prime lens look, realistic light; avoid stock-photo corporate feel; ensure diversity when people appear." Changes save automatically.
Per-post (applies to one post). Open a blog post, go to the Images panel, and expand Image settings for this blog post. Instructions here apply to every image in that single post and add to your blog-level rules. For example: "never show close-ups of hands; prefer wide shots; warm natural light."
Brand Colors in Generated Images
Each blog has a switch for whether your brand colors go into the images Nolorem generates. Find it under Settings, in the image style section, right below the Instructions field. It is on by default.
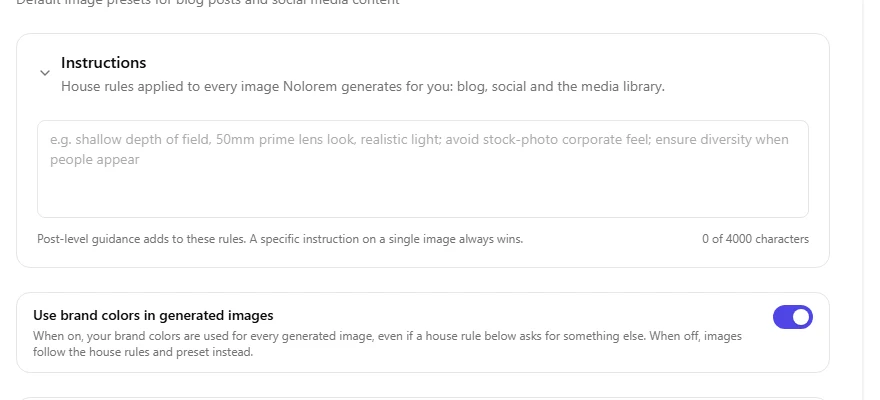
On means your brand colors are used, even when a house rule below asks for something else. That is the point of the switch: it is the one setting that always wins on color. If your house rules ask for black and white and you want that to be what happens, turn the switch off for that blog. Two blogs already asking for black and white were set to off for you.
A blog with no brand palette of its own has nothing to switch, so the control is greyed out and says so rather than doing nothing quietly.
You can also decide per image. Open an image in the editor or the media library and you get the same choice for just that picture: follow the blog setting, on, or off. It starts on "follow the blog setting" and shows you what the blog is currently set to. Switching back to "follow the blog setting" is free and does not regenerate anything.
How strongly the colors show depends on the style. A flat illustration is drawn in your palette, so it shows plainly. A photograph carries your colors on clothing, equipment, props, signage or painted surfaces, so they read as real materials rather than as a color chart. That is a deliberate difference, not a fault.
Which Instruction Wins
Instructions combine from broad to specific, and the more specific one always wins:
- Blog-level instructions set the baseline for every post.
- Per-post instructions add to (and can override) the blog-level rules for that one post.
- A specific instruction you type when regenerating a single image beats both.
Because instructions are applied while the AI composes each prompt, rather than pasted in raw, a targeted change on one image can override a conflicting house rule without you having to edit your blog-level settings.
Your house rules always apply. Describing an image yourself tells Nolorem what the picture is about; it does not switch your house style off. Your instructions and your brand colors travel with every image the platform generates: images written from the article, an image you describe yourself, a regenerated image, a media library asset you regenerate, and a social image. Only the part of a rule that contradicts what you just typed gives way.
A Social Image Picks Its Brand
A social post does not belong to a blog, so when you generate an image for one you choose which blog's brand it carries. Next to that choice sits a separate switch for whether your logo goes on the image; it starts from what the blog you picked does, and you can set it differently for this image. Pick no brand and Nolorem generates without brand colors and without house rules. Choosing a brand also proposes that blog's own image style: pick the blog whose style preset is Photography and the picker moves to Photography. It is a proposal, not a lock, so you can still pick a different style for this one image.
Color Treatments Work in Any Language
If your instructions ask for a specific color treatment, such as black and white, monochrome, sepia, a duotone palette, or "no color", Nolorem detects it and enforces it over the preset's colors and your brand colors. This works in any language, so "noir et blanc", "schwarzweiss", "blanco y negro", "zwart-wit", and "monochroom" are all understood.
Custom Brand Preset
Upload one or more reference images that represent your brand's visual identity. The AI analyzes them and extracts style characteristics (color palette, composition, mood, lighting). The resulting Custom Brand preset generates images that match your brand consistently. Available on Pro and Premium plans.
Image Generation for Social
Social post images work the same way but use platform-specific aspect ratios (1:1 for Instagram and Threads, 16:9 for X and Bluesky, 1.91:1 for LinkedIn and Facebook, 2:3 for Pinterest).
Alt Text
Every AI-generated image gets automatic alt text for accessibility and SEO. You can edit the alt text in the blog post editor or social composer.
Generating Does Not Lock You Out
When you generate a single image (the featured image, or one article image), it no longer locks the rest of the post while it works. A tile appears in the Images panel showing the generation is under way, and you can keep typing, editing other sections, or working elsewhere in the post at the same time. The panel itself is wider now and you can drag it to resize.
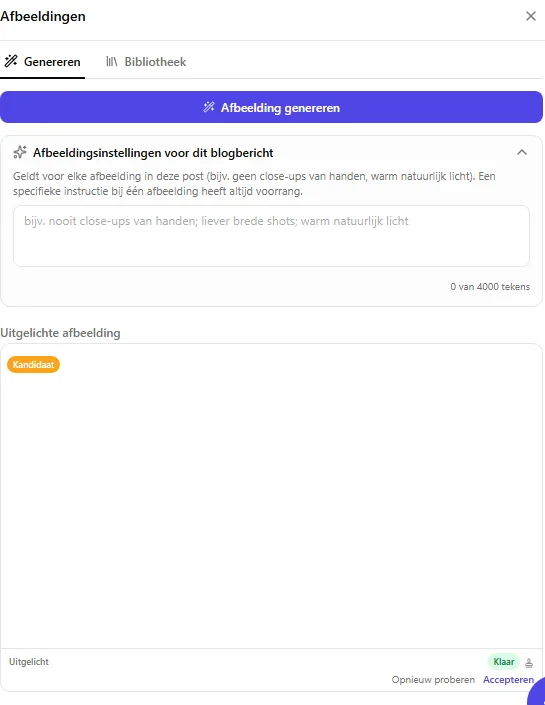
A Result Is a Proposal Until You Accept It
A newly generated image does not replace your current one right away. It appears in the panel as a proposal, with three things you can do with it:
- Accept makes it the image of the post (or of that spot in the article). If you are replacing an existing featured image, the old one is not thrown away -- it stays in your media library, just no longer attached to this post.
- Retry rejects the proposal and puts it in the trash, where it stays recoverable for thirty days, same as anything else you delete. Nothing about your post changes.
- Cancel, while it is still generating, stops the run. What the AI had already produced by the moment you clicked still counts toward your monthly image count -- cancelling stops it from becoming your post's image, it does not undo the generation itself.
If you close the panel with a proposal still undecided, nothing is lost: it is still there, with Accept and Retry, the next time you open the panel.
Replacing an Image You Already Have
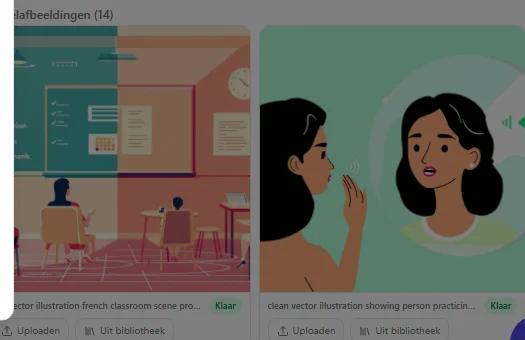
Every image slot, filled or empty, carries the same two buttons: Upload your own file, or choose From library an image you already have. Using either on a filled slot swaps the image in place without discarding the old one -- it stays in your media library, unattached.
Regenerating Images
If an image does not match your expectations, click the regenerate button on that specific image. Each regeneration counts toward your monthly image generation limit. The previous image is replaced in both the post and the media library. Once a replacement succeeds, the old file is removed from storage -- Undo is available right after a regenerate, and using it brings the old file back and discards the new one; that undo window closes once you regenerate again or close the panel.
When an Image Fails
An image can fail to generate. When that happens the card stays in the panel and says so, marked Failed, with the reason underneath. Nothing is hidden and no failed image is quietly dropped from the list.
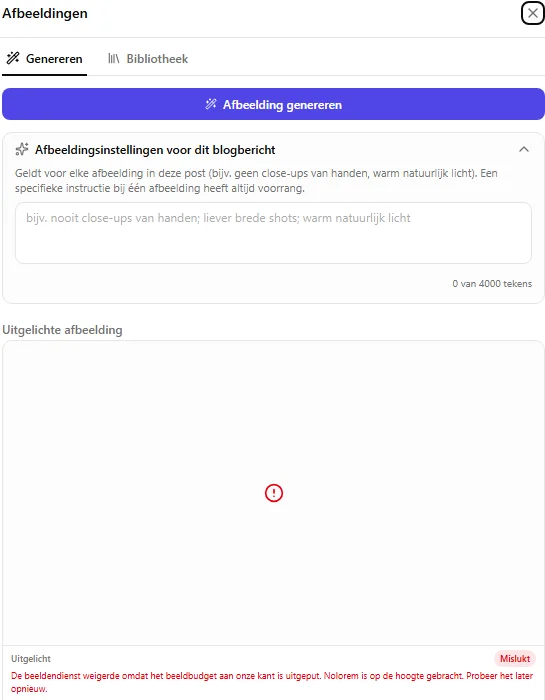
The failure reason reads in your own language first -- a sentence you can act on, such as a balance problem, a safety refusal, or a network issue on our side -- with the image provider's own original wording kept underneath as a technical detail, never discarded.
Use Retry on the card to generate that one image again. This is the cheap way: it regenerates the image only, and, since it now follows the same accept-or-reject flow above, the failed attempt goes to the trash rather than sitting on the card forever. The retry button on a campaign row is a different, far more expensive action that rebuilds the whole article, so if all you want is the picture, use the one in this panel.
If every image failed
When a post or campaign item finishes and all of its images failed, it no longer reports itself as simply done:
- The campaign row carries a red Images failed marker, visible in the list without opening the item.
- You get one notification in the bell about that post. One, not one per image.
- No email is sent to you for this. It is a notification, not an alert in your inbox.
A partial failure is treated as an ordinary success: if one image out of four failed, the item is finished, there is no marker and no notification. You will still see the failed card in the panel and can retry it there.
A successful retry clears the marker. So does switching images off for that item, because that is a successful run of what you asked for.
Images you already had are safe
If a post already had images and a full regeneration fails, the existing images stay. A failed run cannot take your current pictures with it.
Related articles
Frequently asked questions
Was this article helpful?
Still need help?
Can't find what you're looking for? Open your support portal for live chat and tickets. Sign in with your Nolorem account.
Open support portal